How to Make a High Resolution Image From Low Resolution
How to Make a High Resolution Image From Low Resolution
A low-resolution image can look blurry, pixelated, or unclear when you enlarge it. This is especially frustrating when you need the picture for printing, a website, social media, presentations, or professional projects. Fortunately, modern image enhancement and AI upscaling technologies can improve the appearance of small images and make them look significantly sharper.
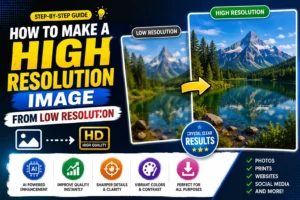
If you are wondering how to make a high resolution image from low resolution, the key is to increase the image dimensions intelligently while preserving as much detail as possible. Traditional image editors can resize pictures, but AI-powered tools can go further by analyzing pixels and reconstructing details that are difficult to recover with ordinary resizing.
This guide explains several practical ways to improve low-resolution images, including AI image upscaling, traditional editing software, sharpening techniques, and optimization tips.
What Is a Low Resolution Image?
Resolution refers to the amount of visual detail contained in an image. It is commonly described using dimensions such as 640 × 480, 1280 × 720, or 1920 × 1080 pixels.
A low-resolution image contains fewer pixels. When you enlarge it significantly, the available pixels have to cover a larger area. This can result in:
- Blurry edges
- Visible pixels
- Loss of fine details
- Soft facial features
- Jagged lines
- Compression artifacts
- Reduced print quality
For example, enlarging a 500 × 500 pixel image to 3000 × 3000 pixels using a basic resize function may produce a larger picture, but it does not automatically create genuine photographic detail.
Can You Really Turn a Low Resolution Image Into High Resolution?
Yes, but there is an important limitation.
You can increase the pixel dimensions of a low-resolution image and use AI enhancement to create a more detailed-looking result. However, software cannot always recover information that was completely lost in the original image.
AI image upscalers work by analyzing patterns, edges, textures, colors, and other visual information. They then estimate what missing details might look like.
The result can be much sharper and cleaner, but it should not be considered a perfect recovery of the original scene.
How to Make a High Resolution Image From Low Resolution
There are several ways to improve a low-resolution picture. The best method depends on the original image, the desired output size, and the software available to you.
1. Use an AI Image Upscaler
One of the easiest methods is to use an AI-powered image upscaler.
AI upscaling tools can enlarge an image while attempting to reconstruct details. Instead of simply stretching pixels, these tools analyze the image and generate additional visual information.
A typical workflow looks like this:
- Select your low-resolution image.
- Upload it to an AI image enhancement tool.
- Choose an enlargement level.
- Let the tool process the image.
- Review the enhanced result.
- Download the image in a suitable format.
Many tools provide options such as 2x, 4x, or higher enlargement. Start with a moderate enlargement level before attempting an extremely large output.
2. Resize the Image With an Image Editor
Traditional image-editing software can also increase image resolution.
Open your picture in an editor and locate the image-size or resize option. Enter the desired dimensions and select a high-quality resampling method.
For example, you might change:
Original: 800 × 600 pixels
New size: 2400 × 1800 pixels
The image will contain more pixels after resizing, but simply increasing dimensions does not restore missing details. For better results, combine resizing with appropriate sharpening or AI enhancement.
3. Apply Sharpening Carefully
After enlarging an image, sharpening can make edges appear more defined.
Most image editors provide sharpening controls. Depending on the software, you may find options such as:
- Sharpen
- Unsharp Mask
- Smart Sharpen
- Clarity
- Texture
- High Pass sharpening
Avoid applying too much sharpening. Excessive sharpening can create halos around objects, emphasize noise, and make the image look unnatural.
4. Remove Noise Before Upscaling
Noise can become more noticeable when a small image is enlarged.
If the original picture contains significant digital noise, consider reducing it before or during the enhancement process. A cleaner source image generally gives an upscaler better information to work with.
However, aggressive noise reduction can also remove useful details. Use moderate settings and compare the result with the original.
5. Use the Original Source Whenever Possible
If you have access to the original photograph, always use it instead of a screenshot, compressed copy, or image downloaded from social media.
For example, a camera’s original image usually contains considerably more information than a version that has been repeatedly compressed and resized.
When possible, start with:
- Original camera files
- High-quality JPEG files
- RAW photographs
- Original PNG graphics
- High-resolution scans
The better the source, the better your final result is likely to be.
How AI Image Upscaling Works
AI upscaling uses machine-learning models to estimate additional image information.
Traditional resizing mainly calculates new pixels from existing pixels. AI-based systems can recognize visual structures and patterns and use learned information to produce a more convincing result.
For example, when enhancing a portrait, an AI system may identify:
- Eyes
- Hair
- Skin
- Facial contours
- Clothing
- Background elements
It can then reconstruct these areas with greater apparent clarity.
This is particularly useful for old photographs, small portraits, product images, illustrations, and other pictures where increasing size alone would produce a blurry result.
Best Settings for High Resolution Image Enhancement
There is no single setting that works perfectly for every image. A good approach is to make smaller adjustments and inspect the result after each step.
Resolution
Choose the final dimensions based on where the image will be used.
For websites, you may not need an extremely large image. For printing, you generally need substantially more pixels.
Upscaling Factor
Start with 2x or 4x enlargement when possible. Extremely aggressive upscaling can produce artificial textures or unrealistic details.
Sharpening
Apply moderate sharpening after enlargement if the image appears soft.
Noise Reduction
Use enough noise reduction to clean up distracting grain without destroying important details.
File Format
JPEG is convenient for photographs, while PNG can be useful for graphics requiring lossless compression or transparency.
How to Improve Old and Blurry Photos
Old photographs often suffer from multiple problems at the same time. They may have low resolution, scratches, faded colors, noise, blur, and compression artifacts.
A useful restoration workflow is:
Step 1: Scan the Original
If you have a physical photograph, scan it at a high optical resolution rather than using a low-quality phone copy.
Step 2: Crop the Image
Remove unnecessary borders and distractions.
Step 3: Reduce Major Noise
Clean up excessive grain or scanning artifacts.
Step 4: Upscale the Image
Use an AI enhancement tool or high-quality image-resampling method.
Step 5: Correct Contrast and Color
Adjust brightness, contrast, white balance, and saturation when necessary.
Step 6: Sharpen the Final Image
Apply gentle sharpening to improve perceived detail.
Step 7: Export Carefully
Save the final image using settings appropriate for its intended purpose.
How to Make a Low Resolution Image Better for Printing
Printing requires more consideration than simply making an image larger.
A printer needs enough pixel information to reproduce the image clearly at the intended physical size. Print quality is often discussed in terms of pixels per inch, or PPI.
For example, an image that looks acceptable on a phone screen may not look good when printed as a large poster.
Before printing, consider:
- Final physical print dimensions
- Image pixel dimensions
- Recommended PPI
- Printer capabilities
- Paper type
- Viewing distance
If the source image is extremely small, AI upscaling can help, but it cannot guarantee professional-quality results for very large prints.
How to Make a Low Resolution Image Clearer for a Website
Website images require a balance between quality and file size.
A very large image can look excellent but may increase page-loading time. On the other hand, an overly compressed image may look blurry.
For websites, follow these practices:
- Start with the highest-quality source available.
- Resize the image to the actual display dimensions.
- Use an appropriate compression level.
- Choose modern image formats when supported.
- Keep important images visually sharp.
- Avoid repeatedly saving and recompressing JPEG files.
Optimized images can improve both user experience and website performance.
Common Mistakes When Upscaling Images
Understanding what not to do is just as important as knowing the correct process.
Enlarging the Image Too Much
Turning a tiny image into an enormous file does not automatically produce high-quality detail.
Using Excessive Sharpening
Too much sharpening can make edges look unnatural and introduce visible halos.
Repeatedly Compressing JPEG Images
Every lossy JPEG save can potentially reduce image quality. Keep an original copy and perform edits from that file.
Ignoring Image Noise
Upscaling can make existing noise more noticeable.
Expecting AI to Recover Everything
AI can estimate missing information, but it cannot guarantee that every reconstructed detail is historically or photographically accurate.
Starting With a Screenshot
Whenever possible, obtain the original file rather than working with a screenshot or heavily compressed copy.
AI Upscaling vs Traditional Resizing
Both methods have their uses.
| Method | Main Advantage | Limitation |
|---|---|---|
| Basic resizing | Simple and fast | Limited detail recovery |
| Sharpening | Improves perceived clarity | Cannot create lost information |
| Noise reduction | Cleans noisy images | Can remove fine details |
| AI upscaling | Can reconstruct convincing details | Results vary by image |
| Professional restoration | Offers detailed control | Requires more time and skill |
For many users, AI upscaling combined with careful editing provides the best balance between convenience and quality.
Which Images Benefit Most From Upscaling?
AI enhancement and high-quality resizing can work particularly well with:
- Portrait photographs
- Old family photos
- Product images
- Digital artwork
- Illustrations
- Logos
- Small web images
- Scanned documents
- Social media photographs
Results can vary considerably depending on the original image.
A clean but small image may upscale better than a heavily compressed, blurry, or damaged image with the same dimensions.
How to Preserve Image Quality After Upscaling
Once you have created a high-resolution version, protect the result.
Keep an untouched original and save your enhanced version separately. Avoid repeatedly opening, editing, and saving the same JPEG file.
For important projects, consider keeping a high-quality master file and creating smaller copies for websites or social media.
You should also avoid unnecessary conversions between multiple file formats.
Is AI Upscaling Good for Faces?
AI upscaling can be particularly effective with portraits because modern models are often trained to recognize facial structures.
However, facial enhancement requires caution. If the original face is extremely blurry or tiny, the software may generate details that were not clearly present in the source.
For personal photographs, compare the enhanced image with the original and make sure the person’s appearance remains natural.
Can You Increase Resolution Without Losing Quality?
You can increase the pixel dimensions while minimizing visible quality loss, but technically you cannot guarantee that no information will be lost or invented.
The best strategy is to start with the highest-quality source available and use an appropriate enlargement method.
AI upscaling can produce a much more detailed-looking image than ordinary interpolation, particularly when the source contains recognizable structures.
Frequently Asked Questions
1. Can I turn a low-resolution image into high resolution?
Yes. You can increase its pixel dimensions using image-editing software or an AI upscaler. AI tools can often produce a sharper and more detailed-looking result than basic resizing.
2. What is the easiest way to upscale a photo?
Using an AI image upscaling tool is usually one of the easiest options. Upload the image, choose an enlargement level, process it, and review the result.
3. Does increasing resolution improve image quality?
Increasing resolution increases the number of pixels, but it does not automatically restore lost detail. AI enhancement and sharpening can improve perceived quality.
4. Can a blurry photo become clear?
A moderately blurry photo can often be improved, but extremely blurred images have limited recoverable information. Enhancement tools can estimate details but cannot guarantee a perfect restoration.
5. What is the best image format for high quality?
The best format depends on the purpose. PNG is useful for graphics and lossless storage, while high-quality JPEG is commonly used for photographs. Other modern formats may provide a better quality-to-file-size balance.
6. How much can I upscale an image?
A 2x or 4x enlargement is a practical starting point for many images. Larger increases may work, but artifacts and artificial-looking details can become more noticeable.
7. Can I upscale an old photograph?
Yes. Old photographs can often benefit from a combination of restoration, noise reduction, color correction, sharpening, and AI upscaling.
8. Does AI upscaling create new details?
AI upscaling can generate estimated details based on patterns learned by the model. These details may improve the visual appearance, but they should not always be treated as exact information from the original image.
9. Can I make a low-resolution image suitable for printing?
You can often improve it for printing by enlarging and enhancing the image, but the final quality depends heavily on the original resolution and the desired print size.
10. Why does my enlarged image still look blurry?
The original may contain too little detail, excessive compression, motion blur, focus problems, or noise. Try using a better source image, moderate AI upscaling, and careful sharpening.
Final Thoughts
Learning how to make a high resolution image from low resolution can help you improve old photographs, small digital images, portraits, graphics, and images intended for printing. The most effective approach is usually to start with the best original file available, upscale it carefully, reduce unwanted noise, and apply moderate sharpening.
AI image enhancement can provide impressive results because it does more than simply stretch existing pixels. However, the quality of the final image will always depend on the source. An extremely small or heavily damaged picture cannot always be transformed into a perfectly detailed high-resolution photograph.
For the best results, avoid extreme enlargement, preserve your original file, use appropriate export settings, and compare the enhanced image against the source before publishing or printing it.