How to Replace an Image in Canva Without Losing Design
Canva makes it easy to create professional designs without advanced graphic design skills. However, when you need to update a photo in an existing design, you may worry about changing the layout, spacing, or other elements.
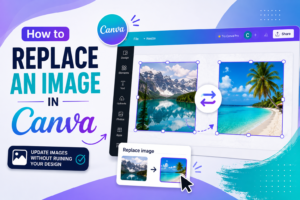
The good news is that you do not need to delete the old image and start again. Learning how to replace an image in Canva allows you to swap photos while keeping the existing design structure intact.
Whether you are editing a social media post, presentation, flyer, poster, thumbnail, invitation, or marketing graphic, replacing an image can save time and keep your design consistent.
In this guide, you will learn the easiest ways to replace an image in Canva, how to maintain the original layout, how to adjust the replacement photo, and how to fix common problems.
Why Replace an Image Instead of Deleting It?
Deleting an image and adding another one manually can change the balance of your design. You may need to resize the new photo, reposition it, adjust the crop, and align it with other elements.
Replacing the image is usually faster because the existing image area remains part of the design.
Some advantages include:
- Saves editing time
- Keeps the existing layout
- Maintains the image frame
- Makes templates easier to customize
- Reduces the need for manual resizing
- Helps maintain consistent spacing
- Makes it easier to update old designs
This is particularly useful when working with Canva templates where the image already has a specific position and size.
How to Replace an Image in Canva Step by Step
The easiest method is to drag a new image over the existing image.
Step 1 Open Your Canva Design
First, open Canva and sign in to your account.
Open the project containing the image you want to change. It could be a presentation, Instagram post, YouTube thumbnail, poster, document, or another type of design.
Before making changes, make sure you have selected the correct design.
Step 2 Find the Image You Want to Replace
Click the image that you want to change.
If the design contains several photos, check that the correct image is selected before replacing it.
You can use an image from your Canva library or upload a photo from your computer.
Step 3 Choose Your New Image
Use the Uploads section to select one of your own images.
Alternatively, you can search Canva’s available photos and graphics if you want to use an image from its library.
Choose a replacement image that fits the purpose of your design.
For example, if you are replacing a product photo, select an image with similar proportions and a suitable background.
Step 4 Drag the New Image Over the Existing Image
This is the most important step.
Drag your new image over the old image. Wait until Canva indicates that the new image will replace the existing one, then release the mouse.
The replacement should fit into the existing image area instead of creating a completely separate element. This drag-and-drop approach is commonly used for replacing images in Canva frames.
Step 5 Check the Layout
After replacing the photo, look at the complete design.
Check the following:
- Image position
- Crop
- Text placement
- Spacing
- Colors
- Borders
- Shadows
- Overall balance
The purpose of replacing an image is to update the visual content without rebuilding the design.
How to Replace an Image Inside a Canva Frame
Frames are one of the easiest ways to replace images in Canva.
A frame acts as a container for an image. You can place a photograph inside the frame, and Canva automatically crops it according to the frame’s shape.
To replace the image:
- Open your Canva design.
- Find the frame containing the old image.
- Open Uploads or another image source.
- Select your new image.
- Drag the image over the existing frame.
- Release it when Canva highlights the frame.
- Check the result.
The frame remains in place while the photo inside it changes. This is why replacing images in templates can be much faster than deleting the existing image and creating a new layout.
How to Adjust the Image After Replacing It
Sometimes the new photo does not show the exact area you want.
For example, a person’s face might be too close to the edge, or an important product detail may be outside the visible area.
You can adjust the image without changing the frame.
Double-click the image inside the frame. You can then reposition the photo within the frame so the most important part is visible.
Move the image until you are satisfied with the composition, then confirm the adjustment.
This is especially helpful when the replacement image has a different aspect ratio from the original.
How to Replace an Image Without Changing the Design Layout
If your main goal is to preserve your design, avoid deleting the existing frame or image area unless necessary.
Instead, use the existing image container and replace its contents.
Before replacing an image, consider these factors:
Match the Image Orientation
If the original photo is horizontal, a horizontal replacement may require less cropping.
Likewise, a vertical image generally works better in a portrait-oriented frame.
Choose a Suitable Resolution
Use a reasonably high-quality image, especially for designs that will be printed or displayed at a large size.
A small image stretched into a large area may appear blurry.
Consider the Subject Position
Look at where the subject appears in the original image.
If the design has text next to the photograph, choose a replacement that leaves enough visual space for the text.
Check the Colors
A bright image can look very different from a dark image even when both have the same dimensions.
Consider how the replacement photo works with your background, typography, and other design elements.
How to Replace an Image on Canva Mobile
You can also replace images while working with Canva on a mobile device.
The exact buttons can vary depending on the Canva app version and the type of element selected.
A typical workflow is:
- Open the Canva app.
- Open your design.
- Tap the image you want to change.
- Look for the Replace option when available.
- Select an image from your device or Canva’s available content.
- Apply the replacement.
- Adjust the crop if necessary.
You can also work with frames by adding or selecting an image and placing the replacement photo into the frame.
After making the change, review the complete design on your phone before exporting it.
How to Replace an Image in a Canva Template
Canva templates often contain image placeholders that make customization simple.
Suppose you downloaded a social media template with a stock photo but want to use your own photograph.
Instead of rebuilding the design, select your replacement image and drag it over the existing image area.
The template’s structure can remain intact while you update the visual content.
This is particularly useful for:
- Instagram posts
- Facebook graphics
- YouTube thumbnails
- Business presentations
- Flyers
- Posters
- Invitations
- Product advertisements
- Blog graphics
Using the existing image area helps you customize templates while maintaining their original visual structure.
What to Do If Canva Does Not Replace the Image
Sometimes dragging an image does not produce the expected result.
If the new image appears beside the old one instead of replacing it, try these steps.
Make Sure You Are Dropping It in the Correct Area
Move the new image directly over the existing image or frame.
Wait for Canva’s visual indication before releasing the mouse.
Check Whether the Image Is Locked
A locked element may prevent you from changing it normally.
If the design contains a lock icon, check whether you have permission to edit the element.
Check Whether You Selected the Correct Element
Complex designs can contain multiple overlapping elements.
Click the image carefully and make sure you are working with the intended element.
Try Undo
If the replacement produces an unwanted result, use the undo command immediately.
On Windows, you can generally use Ctrl + Z. On Mac, use Command + Z.
Undo is useful when an image is accidentally added instead of replacing the original.
Can You Replace Images Across Multiple Canva Designs?
If the same image is used in multiple Canva designs, replacing it individually can take considerable time.
Canva also provides a Replace Across Designs workflow for certain accounts and use cases. This can be useful when updating recurring brand graphics or replacing an image that appears in several projects.
For example, imagine that a company has used an old product photograph in several marketing designs. Updating each design manually could take a long time.
A feature that updates multiple designs can make this type of workflow more efficient.
Availability can depend on your Canva plan and the feature version available to your account.
Tips for Replacing Images Without Losing Quality
Knowing how to replace an image in Canva is only part of the process. You should also make sure the new image looks good in the finished design.
Use High Quality Images
Start with the best source image available.
A high-resolution photograph generally gives you more flexibility when cropping and resizing.
Avoid Excessive Cropping
If your replacement photo has a very different composition, too much cropping may remove important details.
Adjust the image inside the frame instead of forcing it into an unsuitable position.
Maintain Visual Consistency
When replacing an image in a series of designs, try to maintain a similar style.
For example, if all your previous images have clean backgrounds and soft lighting, a dramatically different replacement may make the design look inconsistent.
Review Before Downloading
Always inspect the complete design before exporting.
Look for:
- Cropped faces
- Hidden products
- Blurry images
- Misaligned elements
- Poor color combinations
- Text overlapping important parts of the photo
A quick final check can prevent unnecessary revisions.
Common Mistakes to Avoid
Replacing an image is simple, but beginners can still make mistakes.
Deleting the Entire Frame
If you delete the frame instead of replacing its image, you may lose the original shape and layout.
Using a Very Small Photo
A low-resolution photo may become blurry when enlarged.
Ignoring the Crop
A replacement image can have a different composition. Always check what part of the image is visible.
Changing Other Elements Unnecessarily
If your goal is simply to update a photograph, avoid moving text, shapes, and other design elements unless they actually need adjustment.
Forgetting to Review the Final Design
The replacement may look good while editing but create a visual problem when viewed as a complete design.
Frequently Asked Questions
Can I replace an image in Canva without changing the layout?
Yes. Using the existing image area or frame allows you to swap the photo while keeping the design structure intact.
What is the easiest way to replace an image in Canva?
The simplest method is to drag a new image over the existing image or frame and release it when Canva indicates that it can be replaced.
Can I replace an image in a Canva frame?
Yes. Drag your new image over the existing frame. The frame remains in place while the new image fills it.
Will replacing an image change the frame?
Normally, the frame itself remains unchanged. Only the image inside the frame is updated.
Can I replace an image with my own photo?
Yes. You can upload your own image and use it as the replacement.
Can I use Canva photos to replace an existing image?
Yes. You can select an appropriate image from Canva’s available image library and place it into the existing image area.
Why does my new image appear next to the old image?
You may have dropped the new image outside the replacement area. Try dragging it directly over the old image and wait for the replacement indication before releasing it.
How can I reposition a replacement image?
If the image is inside a frame, double-click it and adjust its position within the frame until the desired portion is visible.
Can I undo an image replacement?
Yes. If you immediately want to restore the previous image, use Canva’s undo function.
Can I replace an image across multiple Canva designs?
Canva provides a Replace Across Designs option for eligible accounts and workflows, which can help update an image used in multiple projects.
Conclusion
Learning how to replace an image in Canva can make your design workflow much faster. Instead of deleting an existing photo and rebuilding the layout, you can usually drag a new image into the existing image area or frame.
The most important thing is to preserve the structure of your design. Choose a suitable replacement image, place it correctly, adjust its crop when necessary, and review the final result before downloading.
Whether you are customizing a template, updating a presentation, refreshing a social media graphic, or changing a product photo, image replacement is a simple Canva skill that can save time while keeping your designs professional.